Practice Exercises - WordPress Basics
Practice Assignment #1This section is an example of Fullwidth section and Fullwidth Header Module.
A full width section covers the width of the device browser (desktop, tab and mobile).
Practice Assignment #2 – Add Text Module in a row and give background color as green (or your choice))
Practice Assignment #4 – Add below Full Width Image Module in a Fullwidth Section and add an image from the link used earlier – http://portfolio.ultirags.com/video-and-images-url-public-domain-free/
Practice Assignment #5 – Add below Number Counter Module in a Regular Width Section with 4 columns
Number of Students
Age 8 to 12
Age 13 to 15
Age 16 to 22
Age Above 35
Practice Assignment #7 - Audio Module
Audio PlayerPractice Assignment #8A - Accordion
Education guides us with a path to success and experience let’s us know what works and what does not during this journey.
The best lessons of our life has been through our own experiences!
– Raghuraman Kadambi
Practice Assignment #8B - Accordion
Behind an auto it was written;
In the war of EGO, the loser always wins….
Practice Assignment #8C - Accordion
I read somewhere “if you do not get what you expected, you get experience.”
Very well, no wonder why this world is loaded with experienced people.
Practice Assignment #8D - Accordion
“Busy people always find time!”
One of my customer said upon thanking him for accommodating a meeting request in his busy schedule!
Practice Assignment #9 – Insert a Testimonial Module in a new Row Below
Hi Raghu,
By far one of the best training programs I have witnessed till now. The technical proficiency was an expected outcome, but the differentiators were unique training approach, influencing the change in the mindsets towards PROGRESS as a technology and building a solid base for PROGRESS & good programming practices. Customer expressing their surprise on the quality of output from the participants, meager 4 weeks of training, by itself is the measure of the success of the Program. We were glad to see 8 out of the 9 resources getting deployed on the project and contributing actively.
Thanks to your honest effort and unique approach of building competencies and not just doing a technology training.
Practice Assignment #10 – Insert a Gallery Module in a new row below (display 4 images at a time)
Practice #11 – Portfolio Page (Click Here)
Create a portfolio page that displays pictures of your images. Example:
- Step 1 – From your last three trips, upload about 30 images in the Media gallery to be used for this excercise (with image name and caption)
- Step 2 – Create three project Category from “Projects” menu. Example “Family“, “Friends” and “Others“
- Step 3 – In the “EDIT” mode, add a new Project from “Projets” listed in the left menu. Name this Trip 1 – With Family and attach this to Family category and add a feature image for this album on the right side of teh page.
- Step 4 – Add a regular section, one row and one column. In this column add “Gallery” module.
- Step 5 – Upload 10 Images from one Trip
- Step 6 – Save this Project
- Step 7 – Repeat the same step for two more project (two more trips)
- Step 8 – Create a new Page (practice 11) and add a regular section, one row and one column. In this column add “Filterable Portfolio” module.
Practice Assignment 12 – Website Settings Change
Login to your WordPress administration website
Ex. http://ultirags.com/neha/wp-admin
After you login, do the following from the Admin Menu
Appearence >> Widgets
1. Remove Side Bar from the website
2. Delete the footer links
Divi >> Theme Options >> General (tab)
1. Logo – Upload a logo (240 Pixel Width and 150 Pixel Height) if you cannot upload, use the URL http://ultirags.com/sites/default/files/ultirags-the-story-teller-parrot.png
2. Enable Divi Gallery
3. Click on button “Save Changes“
Divi >> Theme Customizer (or Appearence >> Customize)
- General Settings >> Site Identity – Change SITE TITLE and SITE TAGLINE. Upload SITE ICON small image (this comes in the browser address bar)
- Header & Navigation >> Header Elements >> Check SHOW SOCIAL ICONS and SHOW SEARCH ICON
- Footer >> Layout – Select two COLUMN LAYOUT and change the FOOTER BACKGROUND COLOR to Blue
- Footer >> Footer Elements – uncheck SHOW SOCIAL ICONS
- Bottom Bar >> EDIT FOOTER CREDITS – Add text Copyright <yourname>, 2020
- Mobile Styles >> Review the Tablet, Phone and Mobile Menu
- Color Schemes >> Try Changing the color scheme
- Menus >> Will be done later
- Widget >> Edit Footer Area #1 and Edit Footer Area #2
- Homepage Settings >> Check Static Page and Select your practice page from the dropdown
Practice Assignment #13 – Add contact form. For how to create a Contact Form using the Contract Form Module refer to URL (Video URL Click Here)
Please fill in the contact form
Practice Assignment #14 – Add a menu (refer to steps below)
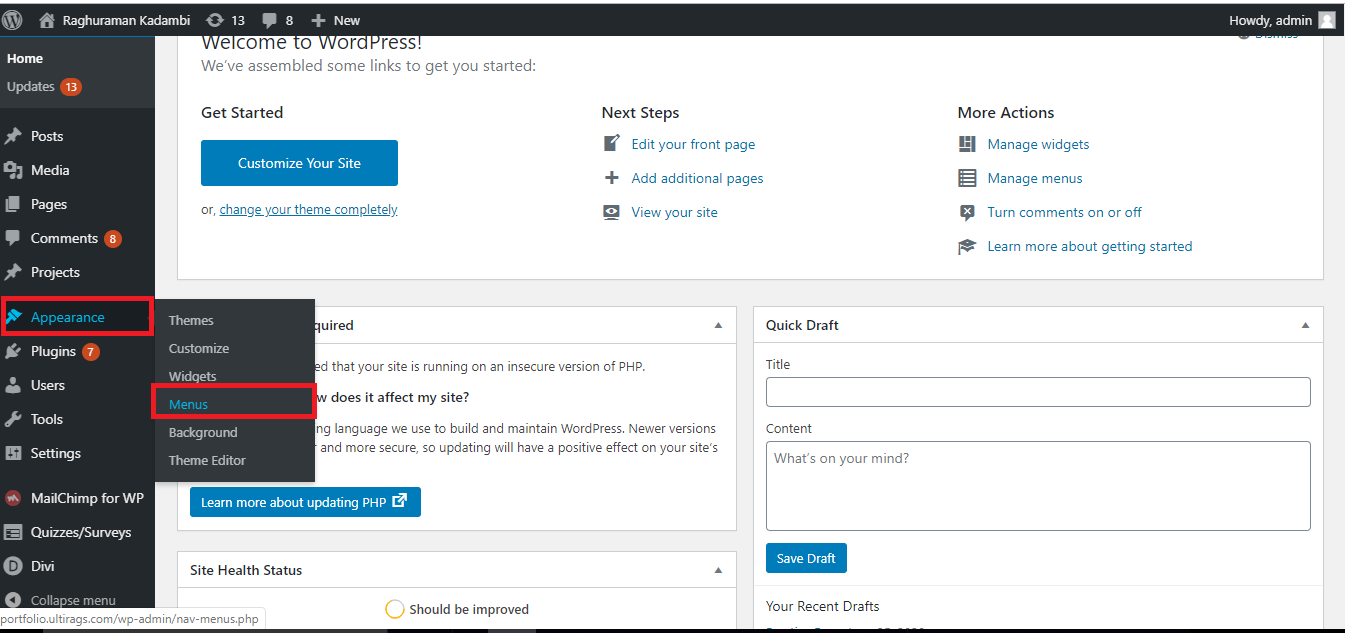
Step 1
Look at the image to navigate to Menus
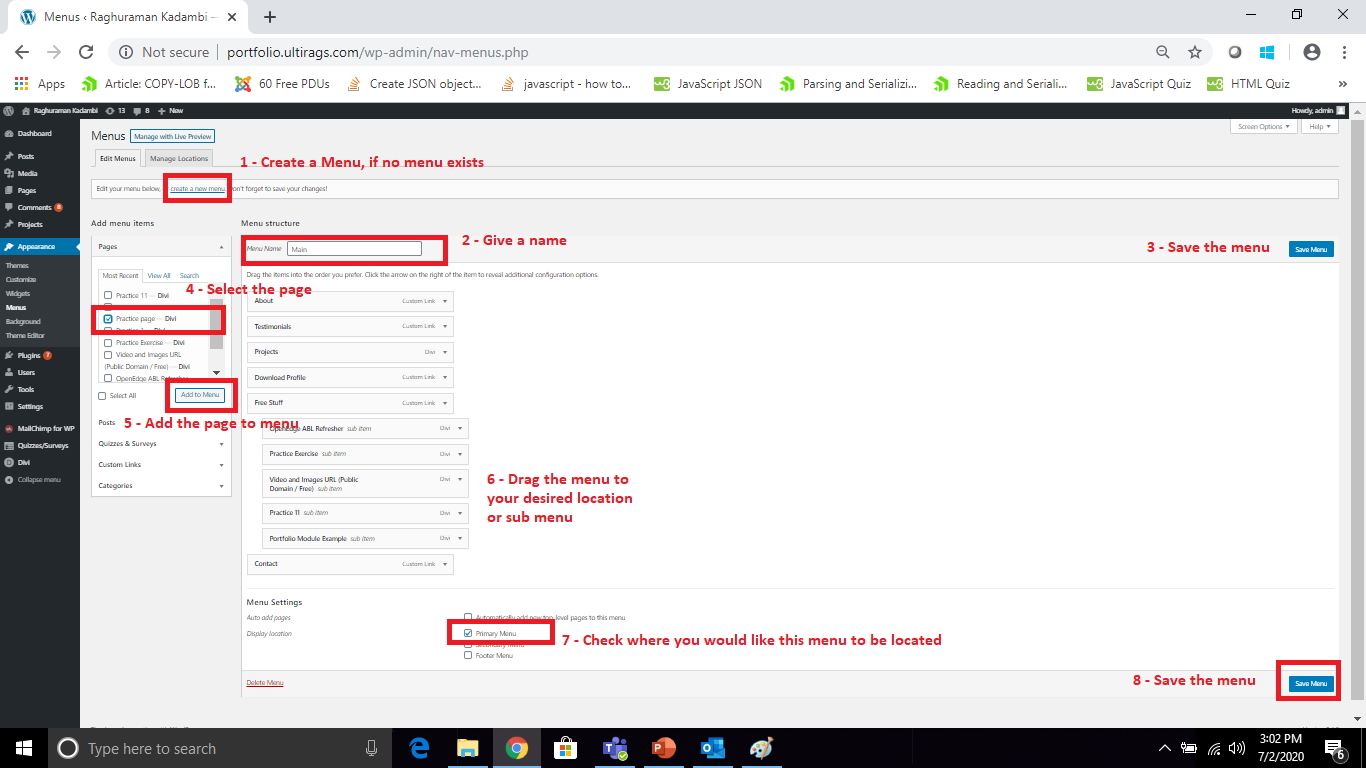
Step 2
Look at the image to navigate to create a menu, add page to menu and selecting the location.
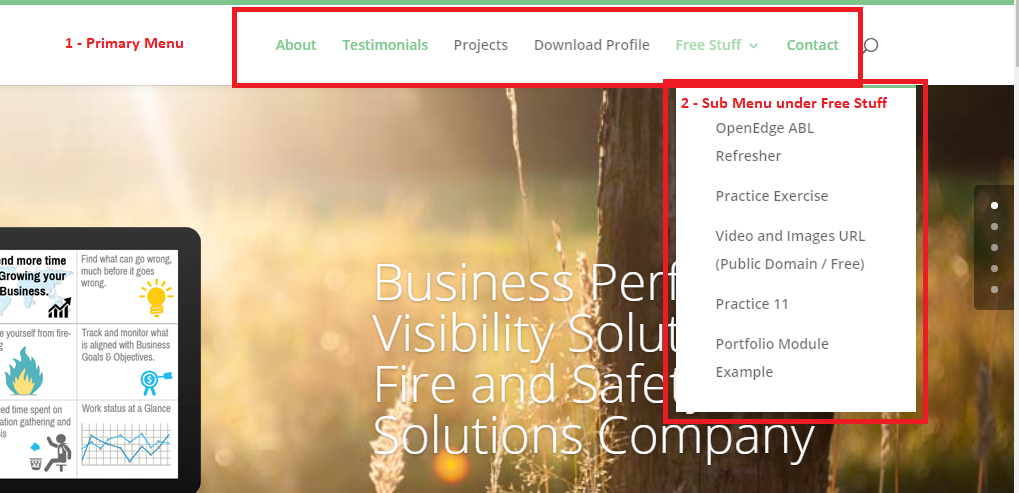
Step 3
This is how your Primary menu looks like in the website.
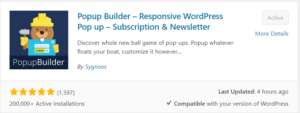
Practice Assignment #15 – Add a plugin “Popup Builder – Responsive WordPress Pop up – Subscription & Newsletter”
